Installing Server Certificate in Cisco ISE
Installing Server Certificate in Cisco ISE
In this post we will be installing a certificate from our Certification Authority. In this scenario, the CA is enabled in my Windows Server 2019 wich also is my DNS server and Domain Controller:

The topology for this lab is as follows:

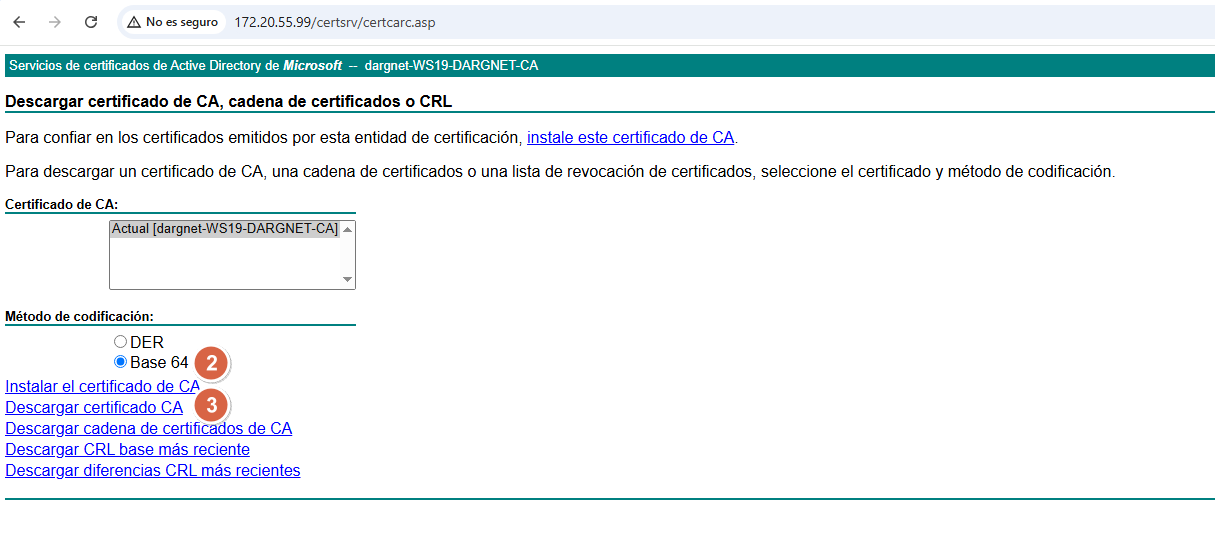
1.- Downloading the Root CA:
Frist step is to navigate to the Active Directory Certificate Services Web Enrollment page: For my lab is https://172.20.55.99/certsrv

2.- Uploading the Root CA in Cisco ISE:
The cert must be uploaded to the "Trusted Certificates" tab:


3.- Generating the Certificate Signing Request
We will generate the CSR to be signed by our CA:


I will add the IP address of the node, so in case my DNS server is down, the certificate will still be valid:

We will need to export the generated CSR and open it in a txt editor:


4.- Signing the CSR:
We will navigate again to our AD CA Web Enrollment page and will use the Request a Certificate link:


Now we can download the certificate:

5.- Binding the certificate
We will bing the certificate now to the ISE node so it can be used:


This will re-start the ISE application
6.- Adding our CA certificate to our trusted CAs
For our laptop to trust our CA certificate (DARGNET_CA.cert downloaded on step 1), we need to add the cert to our Trusted Root Certification Authorities:


7.- The certificate in the ISE node is now valid:


Comentarios
Publicar un comentario